
Wednesday, 29 June 2011
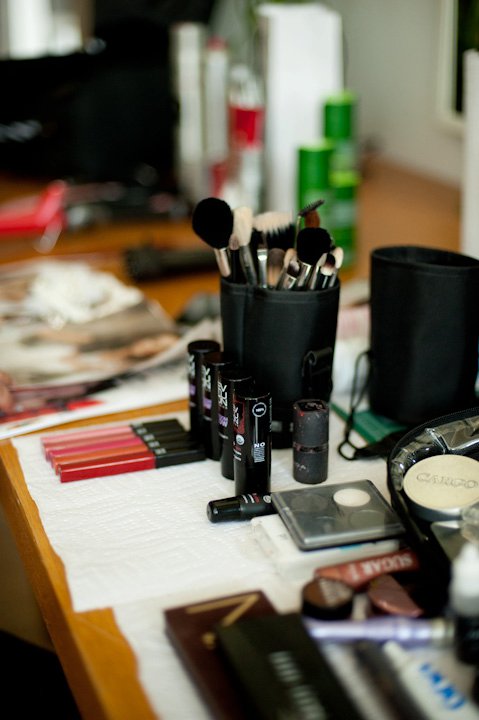
Which Brush Do I Use?
There are so many out there and so many that are great. A lot of them look the same too with only little differences...so WHICH ONES ARE USED FOR WHAT? Here I show you some of the ones I have and which ones I use for what. Remember that there are NO rules to makeup and that includes application. These are just my lil opinions and how I use my brushes. That being said, ENJOY!!! =)
Monday, 27 June 2011
Lauren's Easy Updo
Can I confess? Will you judge? I'm going to have to take the chance.....I {heart} Lauren Conrad. I truly believe that if we were in the same town.......we would be besties! For SURE!!! She has a blog, not that I should be surprised, but I ToTaLlY didn't know that so when I found it I was pretty stoked! This updo was one of my FAVS of hers on whatever colored carpet she was on =). I am so glad that she made a tutorial on it!!! She has a giveaway going on right now and if you jump on over there you can enter to win some of her beauty favs (pictured below). Other than the giveaway she also has TONS of great tutorials on clothes, hair, makeup, and primping. What girl wouldn't love that??? Seriously, check this girl out. You will NOT be disappointed!!!

The Beauty Department's email box is literally flooded with requests for updos, so here’s a fun tutorial from Kristin Ess to get us all going!

This is always a favorite for attending an event. This updo looks gorgeous on any hair color but particularly amazing with highlighted hair because it gives the hair lots of depth and dimension. For lack of a better word, I love the way it becomes “swirly”. Best thing is; it’s easy to do, gorgeous and keeps your hair out of your way for the night.
I made this a printable tutorial, so all of the steps are next to the photos.
Enjoy!
XO Lauren

The Beauty Department's email box is literally flooded with requests for updos, so here’s a fun tutorial from Kristin Ess to get us all going!
This is always a favorite for attending an event. This updo looks gorgeous on any hair color but particularly amazing with highlighted hair because it gives the hair lots of depth and dimension. For lack of a better word, I love the way it becomes “swirly”. Best thing is; it’s easy to do, gorgeous and keeps your hair out of your way for the night.
I made this a printable tutorial, so all of the steps are next to the photos.
Enjoy!
Tools you’ll need:
- Curling iron (to prep the hair with waves)
- Sectioning clips
- Teasing comb or brush
- Clear elastic rubber band
- Bobby pins
- Light to medium holding hairspray (to mist over at the end)
XO Lauren
Sunscreen & Avoiding "Makeup Meltdown"
Here's a double dose from the dailyglow.com since I have missed a few Mondays...I know SLACKER!!! I thought these two issues where SO relevant to us right now that I though I would share them first. Enjoy!
 Have you ever stood in the sunscreen aisle at your local drugstore, staring at the shelves full of tubes and bottles until your eyes glazed over? Help may be on the way. This month, for the first time in 33 years, the FDA released new guidelines that are designed to simplify the confusing and often misleading labels on sunscreens. Most manufacturers have a year to comply, so it should be easier to pick one next summer. Here’s the lowdown:
For more information on the change in sunscreen labeling, visit the American Academy of Dermatology.
 Q: I want to schedule more sessions with the cute new trainer at my gym, but I need to figure out how to keep my makeup from dripping all over my face during the workout. How do I pull off a polished look while exercising?
A: Dripping makeup is messy, and it can be a real turnoff — even at the gym. But don’t sweat it! Here are some tips that’ll help you avoid makeup melt and show off your natural glow instead:

- The word “sunblock” will no longer be allowed on labels, since this implies that the product blocks out all UV rays.
- Only sunscreens that protect equally against UVA (aging) rays and UVB (burning) rays can be labeled “broad spectrum.”
- Sunscreens with SPF of 15 or higher can claim that they prevent sunburn, sun damage, and skin cancer. Sunscreens with SPF less than 15 will be required to carry a warning that they haven’t been shown to prevent skin cancer or aging.
- Sunscreens will not be able to call themselves waterproof or sweatproof. This is because no sunscreen can be completely budge-proof under water. They can be labeled as water-resistant; if so, they’ll need to indicate how long (40 or 80 minutes) you can swim or sweat before the protection wears off.
- In addition, the FDA is proposing a maximum SPF of 50. Sunscreens that have SPF values higher than 50 would be labeled as SPF 50+. This is because there’s no scientific proof that a higher SPF provides more protection from skin cancer and aging compared to products with SPF 50. The agency is also taking a closer look at sunscreen sprays to evaluate how well they protect, as well as the safety of inhaling the mist.
For more information on the change in sunscreen labeling, visit the American Academy of Dermatology.
Here is how to avoid a "makeup meltdown" =):

A: Dripping makeup is messy, and it can be a real turnoff — even at the gym. But don’t sweat it! Here are some tips that’ll help you avoid makeup melt and show off your natural glow instead:
- Wear less makeup. The gym is one place where you can get away with this, so go for it. Instead of full foundation, just dab on a little concealer wherever you need it.
- If you need more coverage, add some tinted moisturizer to help even out your complexion. For oily or acne-prone skin, try Neutrogena’s Healthy Skin Enhancer, which is oil free and noncomedogenic. Bobbi Brown’s Tinted Moisturizing Balm works well for dry skin. (Or mix some of your usual foundation with a bit of moisturizer to make your own.)
- Skip the blush — your workout will give you a natural glow.
- Use waterproof liner and mascara to avoid raccoon eyes. For a clean, natural look, I like Maybelline Unstoppable Smudgeproof Waterproof Eyeliner and L’Oréal’s Panoramic Curl Waterproof Mascara because they add definition and won’t run down your face.
- Use a tinted lip balm instead of lipstick, and skip the lip liner so you don’t end up with an odd-looking outline around your mouth by the end of your workout. And no goopy gloss, either — it’ll just get all over your teeth and water bottle.
Saturday, 25 June 2011
Skin Care Routine
Feel free to check out the full video above!
Otherwise keep reading to get an insight into my skin care routine and the products that I used that have helped clear up my break outs!
About my skin:
When I was a teen I never had break outs, I had the odd spot here and there but nothing crazy. In fact my skin was on the dryer side. Click here to see my top tips on dry skin (http://www.youtube.com/watch?v=Q-khL4aZXzk)
Finally I stopped with all the quick fixes and just used the same products every night and every morning and my skin is getting better and better!
The products I used might not work for you, but finding the right skin care routine will.
Cleanser - Neutrogena Pink Grapefruit Facial Wash
I use this at night to remove my make-up (one pump) and to also clean my skin (second pump). I don’t use this every morning as I don’t want to over wash my skin. Even though I used to take my make-up off at night I didn’t clean my skin too. So now I not only remove my make-up but I wash my face afterwards. I can’t stress enough how important it is to remove your make-up at night Just by doing that you will notice a difference!

Scrub - Simple Smoothing Facial Scrub
I use this once a week or twice if I notice a huge problem. Mostly once does the trick and I will stick to that. Exfoliating is great and feels great too but you have to be careful not to over do it. Especially if you have spots, if you keep disturbing the healing of the spots they will last longer!

Toner - Witch Hazel and Rose Water
This is my favourite part of my routine! I use my toner once in the morning instead of cleansing my skin and once at night after cleansing and I love this stuff! If you are looking for a good toner try looking in the health care and vitamin section of the pharmacy. Witch Hazel and Rose Water are natural extracts that not only remove any oils or dirt felt after cleansing the skin, but it leaves it super smooth and soft too!

Moisturiser - Nivea Soft Moisturiser
This is my favourite ever moisturiser I have tried. I love this more then any other product - high end or low this is the best! I highly recommend this! Seriously!!
Makeup 101: Colourful Smokey Eyes For Summer
Makeup Junkie guest contributor, Olivia, has brought you readers another fantastic tutorial! Can you do smokey eyes in the summer? Yes! Throw out your ideas of the classic smokey eye and swipe some colour on those peepers!
Summer fever is upon us and we’re all itching to get out doors. For some that includes a night out on the town sans jacket, sporting your favourite little black dress. My go-to party look is a smoky eye but in the summer I prefer to substitute the blacks, browns and greys for purples, blues and greens. Really the options are endless with a colourful smoky eye. You could keep your signature look but appear more versatile simply by switching the colours. For this look I decided to use a combination of teal, blue and lavender purple with a gold highlight.

As an avid Makeup Junkie reader, the most important lesson I’ve learned is starting every look with a flawless face. I tend to avoid using foundation but after reading Joy’s reviews on tinted moisturizers I thought I would test out the alternative. I’ve been using Tarte’s Smooth Operator, which has a great natural coverage and really evens out my skin without feeling cakey. Then minor imperfections can be corrected with a dab of concealer. Once you have completed your flawless face, follow these simple steps for a vibrant and alluring nighttime look:
Step 1: Line top and bottom lash lines and blend with your finger (or smudging brush) for that smoky effect.

Step 2: Start with the darkest colour and blend up towards your crease. Using that same colour, line the outer half of your bottom lash line. Taking the lighter shade, blend into your crease and brow bone. With the lighter shade and a pencil brush (try MAC 219 pencil brush) apply the shadow to the lower lash line in order blend the colours and complete the smoky look. For that extra sparkle, sweep a gold shimmer under your eyebrows.

Step 3: To complete the look, line your waterline with the same liner used to begin the smoky eye. Then apply lots of mascara! Since we want to keep the focus on your eyes, keep cheeks and lips simple by using a touch of bronzer and a light gloss.

Step 4: Throw on that little black dress and you’re good to go!
*Products used on eyes:
- NARS eyeliner in Kaliste
- CARGO Lumieres Du Monde palette (blue, purple and gold shadows used)
*Products used on eyes:
- NARS eyeliner in Kaliste
- CARGO Lumieres Du Monde palette (blue, purple and gold shadows used)
Thanks Olivia! I love the softness of the whole look and think it looks gorgeous on her! It's smokey but totally wearable for day. What do you think of this summer smokey eye? Would you wear it?
Thursday, 23 June 2011
Update and something exciting!
Hey guys, long time no see! I haven't been posting for several weeks, due mostly to the fact that I'm moving next week, so life has been more hectic than usual lol. I have been trying to keep up with your blogs a bit, but gosh guys, stop posting so much, I'm too slow! haha ;P

Anyway, there's something exciting I wanted to tell you guys about and ask you for your help: My little sister Abby (whom I've previously posted about here) is in a big contest right now on Facebook; it's a cover contest for the Korean pop group 2NE1, who are super huge in Korea and many parts of Asia.
Abby (Singinferyoo on Youtube) sang her first ever vocal cover of their song Lonely, and got into the finals!! (Just to give you an idea, apparently there were over 2,000 entries, and only 40 finalists chosen by the members of 2NE1 themselves!!! So they picked my sister out of 2,000 entries! How cool is that?)
 |
| Google images |
There will be (I think) 7 winners: the main winner gets a trip to Korea to see 2NE1's first solo concert, and a tour of the YG building! (YG is a huge music/management company, they promote groups like 2NE1 and Big Bang!) The runner-ups get signed merch, etc., and all the winners get their cover video posted on 2NE1s official youtube channel for all their millions of subscribers to see! This is big...
The finalists were announced yesterday and the next phase is a public voting phase. Abby needs all the votes she can get, so if you would like to help her out, scroll down for a link and instructions! It's really easy and only takes a few seconds, I promise! ;)
 |
| Image from 2NE1 official Facebook page. |
1. Click the pic and Like 2NE1's official FB page
2. On the Global Event page, scroll down to entry #26 and click Like >
3. Accept the application (it will direct you to the voting page)
4. Click Like on #26 again and you're done! :D
Of course you don't have to vote for her, or even at all lol. But if you do, please know that Abby really appreciates it. We're so proud of her, she's an amazing and talented person and I hope she can achieve her dream!

Thanks so much for your help and support! <3
I hope to be back in full force in a few weeks after I'm settled in from the move; I already have a bunch of posts planned to share with you guys and I can't wait! Until then, take care guys! ;3
Wednesday, 22 June 2011
How To Beat The Bed Rest Blues: Makeup Part 2

I'm no longer on bed rest, but you still want to know what kept me looking pretty right? Right!
6. Revolution Organics All Over Body Balm ($28 USD): I've raved about this product before and I'll rave about it again (you can read my review here)! This eco-chic all-purpose body balm really came in handy when I was in the hospital. I didn't want to pack too much so this worked as my belly stick, lip balm, and hand cream!
7. Revolution Organics Freedom Glow Beauty Balm ($34 USD): You want the perfect glow? I love these coloured beauty balms for the eyes, lips and cheeks. Yes, I've featured these a few times before and I love them so much I packed all 3 (click here for past reviews). Since I was missing out on some major sun, Bronzed gave me that faux tan my skin needed. I loved using it on my eyes and to contour my cheeks (you know gotta give the illusion of slim cheeks when your pregos!). Sunkissed (coral peach), is so hot for summer right now. I used this one most often. It'll leave your skin looking - well - sunkissed! I loved Blushed (bright pink) on my lips and looked gorgeous with Bronzed on the lids and cheeks.
8. NARS Mayflower Lipstick (LE, Summer 2011, $24 USD): When I first saw this lipstick in the tube, I didn't fall in love right away. But after first swipe, I was hooked. It's described as sheer raspberry, but on me it pulled warmer tones of coral and raspberry-pink. It's the summer version of your lips-but-better, well on me at least! I also adore how moisturizing the texture is. I can usually just swipe this on with minimal makeup and it still perks up my complexion.
9. Lancome Juicy Tubes Awakening of Love (LE, $22 CAD): This review is a little late. I had meant to feature this in time for Toronto's Luminato Festival, but didn't get around to it for good reason. Lora Spiga, Lancome's Official Makeup Artist for Canada, created 3 Juicy Tubes shades and Desert Rose Blush to compliment designer, Denis Gagnon's, Garden of Roses: Denis Gagnon Interprets Alice that was featured during Luminato.
I received Peace & Flowers, a gorgeous shimmering warm pink. The shade is sheer, but it adds subtle colour with a whole lotta shine! For some simple shine and a bit of colour, I wore it on its own. When I wanted more colour, I loved pairing it with NARS' Mayflower and my Revolution Organics Beauty Balms. This Juicy Tube collection (3 shades in total) will be apart of Lancome's Bronze Azure summer 2011 collection.
Have you tried any of these products? Love 'em? Hate 'em? Want 'em?
Products were sent for editorial consideration and I truly love them.
Makeup For Eye Glass Wearers
So here is a tutorial for all of those ladies that are eye glass wearers. Not much different than normal as far as technique bt there are for SURE a few tips and tricks to help with opening up the eyes and concealer issues. I have another tutorial already in mind for when daytime turns to evening and you want to be more dramatic. Tell me though, do you wear contacts for special evenings or do you all still wear glasses no matter what?
Monday, 20 June 2011
A Big Makeup Junkie Thank You!
Where to begin! My last post I was still on bed rest. I still owe you a couple of posts on the beauty products I relied on to keep me looking pretty and sane in the hospital. Well, a lot has happened in 2 weeks. I am no longer on bed rest because my little buddy decided he didn't want to miss the summer and was born on June 11 just two days before his older bro's birthday!
Since he was born 8 weeks early, he's been in the hospital and is doing incredibly well. We're so grateful and fortunate that he has received the best care. I just want to thank my family, friends, blogger and makeup artist friends, and you the readers for your continued love and support! I am so overwhelmed by the messages I receive. Your kind and encouraging words have really gotten me through some tough moments and continue to inspire me to stay strong. THANK YOU, THANK YOU, THANK YOU from the bottom of my heart and I love you all!
Hopefully, I will get back to blogging soon. I have so many hot summer collections to share with you and even some Fall ones! I hope you all are enjoying the summer!
xo,
Joy
Saturday, 18 June 2011
May Favorites
Yeah, I'm a slacker but it's summer and me and my boys are LOVING our time together!!! How is your summer going? What plans do you have and what are you enjoying? Here are some products that other readers are loving.
Kelby says: My favorite product this month is Laura Geller Long Lasting Color Brow Marker Duo. It is truly easy to apply, just like a marker, but matches my hair color perfectly (I got the Taupe). It's fool proof, comes off easier than any other of my products (even with just my face wash!!). I recommend this to anyone who can't leave the house without doing their eyebrows!
Nancy gives us her favs:I'm nearly 52 years old and I've always had a huge interest in beauty products. Over the years I've seen products come and go. And because I've always been on the hunt for the best product to make me look my best, I've tried quite a few. I don't regularly shop the cosmetics counters at the dept. stores because I feel that one can look good with less expensive products purchased at Target or a drugstore. That doesn't mean I haven't tried some. Lancome has been a fave foundation in the past as well as Clinique's eye shadows and Estee's aero matte translucent face powder. But recently I've discovered some products that have made me look the best I've looked in a long time (in my opinion!) They are:

Oil of Olay's Regenerist night resurfacing elixer,

L'Oreal's Magic Smooth Souffle foundation and
L'Oreal's HIP eyeliner in black.
My skin has never looked so youthful and dewey without looking greasy. I don't know if it's the Olay elixer or the L'Oreal foundation...or a combination of the two. Whatever, I'm satisfied! As for the eyeliner, I really prefer a pencil as I seem to be able to use them the best (I sorta have all thumbs). This HIP eyeliner applies so smoothly. And it stays on for hours.
I wanted to share my 3 fave products. I don't know if my standards have lowered or these are really good products because I never endorse a product to anyone. Generally, if I like a product okay, I change my mind after a few weeks of using it. But not these! I really love them.
K ladies, my turn!!! Here is my first love of June =):
LOVE this swimsuit!!!!! SO worth it the money and since this is the first month of pure sun here it is on my May favs list!!! The video has the rest =).
Thursday, 16 June 2011
Sucker Punch Babydoll Tutorial
I have gotten quite a few requests for this look and it was about time to do it. I haven't seen the movie but I hear it is visually stunning and worth it. Have you seen it? Was it any good? Well, this little chica was the most understated as far as makeup was concerned out of all of them. I remember her from A Series Of Unfortunate Events and RARELY do I think that someone who has dark hair naturally looks better blond. Gwen Stefani is one and now this girl is another. I LOVE it!!! I am for sure a fan of the glowing skin and the pink cheeks. Overall, one of my fav looks and I might just do the hair thing again = D. Enjoy!!!

Thursday, 9 June 2011
How To Beat The Bed Rest Blues: Makeup Part 1
Many of you may think I'm ridiculous for even bothering to wear makeup while I'm in the hospital, but to prevent myself from getting deeply depressed, putting on makeup puts me in a good mood. Plus, it forces me to have some sort of routine and purpose for getting up in the morning. Many nurses have asked me if I was being discharged because I'm wearing makeup and wearing normal clothes and when I get wheeled to my ultra sounds, I get a few stares because I'm not wearing the typical hospital garb. One of my favourite nurses, Esther, told me that oddly enough pregnancy looks good on me - I'll take it! Guess I should be pregnant all the time! ha!
Now, don't go thinking I'm wearing a full face of makeup. I'm wearing enough to make me look polished and playing on that "pregnancy glow". Check out which products have been keeping this face in check!

1. Nanoblur ($19 CAD): I've had this product for a while and haven't really had much chance to test it out. I decided I'd use Nanoblur because it could blur out any imperfections that my minimal makeup wouldn't cover up. If you don't know the genius of Nanoblur you'll want to know it. It's not a skincare product but a quick fix for when you need to look 10 years younger in a matter of seconds. It blurs fine lines, wrinkles, redness, minimizes pores and even mattifies the skin making it appear more even and less shiny. It works really well as a primer too. In seconds, I can really notice a difference in the texture and appearance of my skin. I don't have very big pores, but around my t-zone area they are more prominent. As soon as I apply this stuff, it instantly smooths out. The texture applies thick and is more suited for drier or mature skin types but I'm sure would work well on oily skin too in smaller amounts especially since it mattifies. I do find that you have to work it into the skin fast because it absorbs quite quickly. You also have to let it set for a few minutes or else your foundation or concealer won't blend nicely. Great thing is that you can apply when you're on the run over your makeup for a mid-day perk-me-up. It's a great quick fix at such an affordable price!
2. Cover FX SkinTint FX SPF 30 in M Light ($39 CAD): Just because I'm not getting any sun doesn't mean I can't fake it. As mentioned in a previous post, SkinTint FX has been my go to TM. Packing this one for the hospital was an obvious choice for me. It gives me a sun-kissed, radiant glow while giving me some coverage. I don't want to look like I'm made up and SkinTint looks so close to my natural skin. If you're not in the loop, Cover FX wants you to help them spread the word about skin cancer! For the month of June, with every new "Like" on their FB page, they will donate $0.25 to skin cancer research: David Cornfield Melanoma Fund Fund in Canada, The Skin Cancer Foundation in the US and SKCIN, The Karen Clifford Skin Cancer Charity in the UK.
3. Smashbox Photo Op Under Eye Brightener ($18 USD): This one is an oldie but a goodie! I've been using Photo Op for years to brighten under my eyes (read past post here). If you don't suffer from severe dark circles, you can get away with using this as your normal concealer. But for someone that does need more coverage, this helps brightens the under eyes under your concealer. Instead of taking a full coverage concealer with me, I only packed Photo Op because again I didn't want to look too done up. This brightens and gives a luminous effect and if I apply a few layers it covers up the darkness alright. I've also been using it to highlight the inner corners of my eyes, my brow bones and my cheekbones!
4. Urban Decay Naked Palette ($58 CAD): This has to be my HG of neutral palettes! I've been dieing to get my hands on this ever since its launch and every time I went to a Sephora it was sold out. One of my BFF's was doing a little makeup shopping at her local Shoppers and asked me about Urban Decay. Seeing how she's in the Durham region, I was surprised to know that this location carried UD products. I immediately asked if the Naked palette was in stock and to my surprise it was! She snatched it up for me and now we are forever buds. There are a ton of reviews and swatches out there so I'm sure you know what all 12 shades look like. I love the mix of shimmery, matte and satin tones making it an ideal palette for everyday, bridal and for more dramatic looks. I've used it on a lot of my clients and this is one palette I use on myself whenever I go out. I don't use it everyday at the hospital but when I know a visitor is coming I'll emphasize my eyes a little. The shadows I use the most are: Buck (matte brown), Half Baked (bronze), Smog (golden brown shimmer), Dark Horse (bronze-plum shimmer) and Hustle (mocha shimmer).
5. Lancome Hypnose Doll Lashes Mascara ($34 CAD): There hasn't been a Lancome mascara that I've been disappointed with. If you love the lengthening effect of the Hypnose line, you will love the feathery, voluminous finish of the new Doll Lashes mascara (unscented version for Canada). Here's what I love:
- gorgeous, feathery, and voluminous
- the conical brush allows you to get at every lash and at the root
- love the subtle sheen and the shade is a deep, dark black
- gives a very dramatic lash with a few swipes
- lashes feel very soft to the touch
What I didn't love:
- I found the handle of the brush a little big and awkward to hold
- didn't give my lashes as much lift as compared to other brands I've tried. The length was just ok for me.
- the softness of the lash didn't hold the lift and caused my lashes to droop later on in the day
- I prefer water-proof versions. This one was the regular mascara and did smudge on my bottom lash line.
I'm curious to try the water-proof version (if one is released) and see if the lift, hold, and smearing is better. But I really do love the "doll-like" effect it gives. I received the one that is rose scented and actually don't mind it but I think most will appreciate the non-scented version. This mascara will be available mid-August.
Have you tried any of these products? Stay tuned for part 2 of my makeup must-haves!
Products were sent for editorial consideration (with the exception of the UD Naked Palette) and I truly love them!
Wednesday, 8 June 2011
How To Beat The Bed Rest Blues: Skincare
I know, I just couldn't stay away! Stoked that I got my new laptop adapter and now I can blog away!
Everywhere I look, I see women in their hospital gowns, hair matted, skin pale and sallow, dark circles and puffy eyes. Granted, the majority of them just gave birth and looking hot really isn't their first priority. I'm bed ridden, but since I can still move around a bit I'm making an effort to look as "non-patient" as I can if you know what I mean. I refuse to wear a hospital gown unless I really need to and make time to fit in a skin and makeup routine. These to me are some of the things that will keep me sane and feel normal in a not-so-normal situation.
Many of the beauty articles you're reading now are all about "How To Beat The Heat With These Products", but since my problem is being in a stuffy hospital with average air circulation, I need products that will make my skin look bright and radiant! Since the a/c is broken, we have fans blowing everywhere. To prevent my skin from looking lack-luster and dry, I've turned to a few must-have products starting with skincare!

1. Dr. Dennis Gross All In One Cleanser With Toner ($32 CAD. The Shopping Channel): Have I mentioned before that I love multi-taskers? I didn't want to pack a slew of beauty products so this cleanser was the perfect choice. It's a 3-in-1 cleanser that cleanses, tones and removes makeup even water-proof products. It contains natural Witch Hazel, Chamomile, Hyaluronic Acid, and Vitamins A,C, and E so it won't strip your skin. What I love most about it, is that it works for all skin types. If you have dry skin like me, you just need to massage into skin with dry hands for 10 seconds. Oilier types have to massage it in for 30 seconds. It applies really creamy, yet rinses off easily leaving my skin feeling smooth and clean.
2. Bobbi Brown Brightening Advanced Serum ($105 USD): I don't usually wear serums, but once I tried the newest star from Bobbi Brown I couldn't put it down. I seriously love the way it feels on my skin and how luminous my face looks after. It applies so silky smooth and feels super hydrating - some days I'll just apply this on my skin with no moisturizer. It's infused with Red Algae, Vitamin C Complex, and a unique blend of Grape, Mulberry, Scutellaria (soothing and anti-inflammatory properties) that even out the tone of your skin and make it look brighter. I've started noticing that since I've been using it, the tone of my skin seems brighter, texture smoother and my pores smaller. I apply this under my lotion to absorb and lock into the skin, but I think you're supposed to apply over your lotion according to the site. Either way it works lovely, but I'm still balking at the price. I believe in investing in good skin care, so if it's within my budget it's something I would definitely buy again.
3. La Mer The Eye Concentrate ($165 USD): La Mer products are a luxury and definitely not apart of my everyday skincare regime. I was lucky enough to receive a deluxe size and thought why not spoil myself while I'm in the hospital! It's the perfect traveling size. It's a very rich cream so you only need a little at a time. With the dryness in the air right now, the skin around my eyes are loving it. I've only been using it for a little over 2 weeks so I'm not sure it's doing anything for my dark circles but they definitely look hydrated and radiant.
4. La Mer Creme de la Mer ($135 - $1650 USD): My first experience with this luxurious cream, my skin was not in the best shape. I actually had a reaction from a medicine at the time when I started using this. You can read about it here. This time around, my skin is pretty normal despite being on the drier side but can I tell you - I don't like this cream - I LOVE this cream! Why must my skin have expensive taste?? It's just what the doctor ordered. My skin soaks it right up and after my skin looks glowing. Again, it's a deluxe size and I'm trying to savour it as much as I can but I know it will be all gone by the time I'm out of the hospital. I'm sure once that happens, my skin will need less moisture. If you can afford it, it's a fabulous cream. My skin just looks so much smoother and and more luminous.
5. La Mer The Body Creme Tube ($130 USD): Can't forget about the body! I received a deluxe size in the tube form which is so compact and portable. Again, it leaves your skin unbelievably soft and supple. I rarely have to reapply throughout the day because it's so hydrating. It doesn't leave a greasy finish like most richer creams. It has a light scent, but disappears right away.
What's the lesson here? Use expensive skin creams while you're in the hospital and you will feel like a super star! It really is a treat especially when all I have to look forward to is laying on my bed all day. I believe if you don't take care of your outer appearance, it will start to affect the way you feel on the inside. Since I can't control when the baby will come, this is one area of my life I know I can control!
Have you tried any of these products? Do you turn to beauty products to get you out of a funk? Stay tuned for How To Beat The Bed Rest Blues: Makeup post!
Products were sent for editorial consideration and I truly love them.
Saturday, 4 June 2011
Blogging Hiatus
Hello my dear Makeup Junkies! Unfortunately, I'll only be updating my site on a minimal basis - the most once a week. Baby has decided that mommy needs to take a much needed rest and will be at the hospital on bed rest until baby arrives. It's not the most ideal situation but whatever will bring baby into this world healthy and strong! I was finally able to hook up the internet (thanks to my awesome hubby), but to keep charges down will update once a week.
I'll miss perusing my favourite beauty sites but can still connect with you via Twitter, Facebook, and email! Thank goodness for technology or else I would just go batty! For any urgent requests, please contact me via email.
Thank you for all the well wishes - I truly appreciate all the love and support. Baby and I are doing well so far and hopefully this good streak will continue! Thank you for keeping me in your thoughts! Muah!
Much love,
Joy xo
Thursday, 2 June 2011
Behind-the-Scenes: Eco-Chic Bride Winner Photo Shoot!
See behind-the-scene shots of our Eco-Chic Bride winner taken a couple of days ago with fellow beauty blogger and bride-to-be Monica from Beauty Parler! The shoot was sponsored by Revolution Organics, Schwartzkopf Essensity, Glam by Brianne, and Carey Ann Photography. To read about our fun shoot, click here.
Photo Credit: Carey Ann Photography
Wednesday, 1 June 2011
Beauty News: M.A.C. Bloggers' Obsession To Sell Exclusively Online!

M.A.C. really loves bloggers even when our opinions are brutally honest. They strategically created an exclusive line with nine beauty bloggers from all around. How amazing is that? And one of the bloggers just happens to be fellow Canadian beauty blogger, Lesley Ellen of Lipstick, Powder, 'N Paint - way to represent Ellen!
If you ever dreamed of creating a makeup line you can live vicariously through these bloggers! What do you think of the line?

Lesley Ellen (www.lipstickpowdernpaint.com)
"Parisian Skies", a muted grey blue
Probably my favourite and not just because Ellen made it! I just love anything to do with Paris and the colour is beautiful!

Lianne Farbes (www.themakeupgirl.net)
"Hocus Pocus", dark sooty grey with silver pearl

Christine Mielke (www.temptalia.com)
"Jealousy Wakes", seething emerald green with teal and gold pearl

Amber Katz (www.beautybloggingjunkie.com)
"Sparkle, Neely, Sparkle!", a deep rusty brown with champagne coloured sparkle

Patrice Yursik (www.afrobella.com)
"All of My Purple Life", deep purple grape with subtle sparkle

Lily Nima (www.beautymaverick.com)
"Caqui", persimmon orange

Karen Monterichard (www.makeupandbeautyblog.com)
"Evolution Revolution", a warm peachy pink with subtle purple, green, and blue micro glitter

Aileen De Los Angeles (www.theshadesofu.com)
"Sonoran Rain", deep coral red with gold and silver pearl

Wendy Lam (www.nitrolicious.com)
"Nitro:licious 2046", intense shiny red
Available in North America June 21, 2011 at www.maccosmetics.com only.
Subscribe to:
Comments (Atom)