
Tuesday, 20 November 2012

Monday, 19 November 2012
Glossy Box
Glossy Box Goodies!
So I haven't done a glossy box review in awhile, but I am super happy with the November box because I am heading to America on a long haul flight and I have to admit glossy box pick prefect goodies for me! (Not that they realise that though! ha)

WEI - White Lotus Hydrating Face Treatment Pad
It's well know that some gurus like to do masks on long flight, I have never tried it but I really wanna give it ago this time and I think this will be a great option!
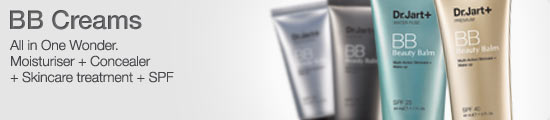
Dr. Jart+ - Water Fuse Beauty Balm
BB creams are prefect for long flight, they give you a little coverage for those of you with uneven skin while hydrating and treating the skin!!
I own two by Dr. Jart+ Most Moist Water Fuse BB Cream
and Gold Label Premium BB Cream.
I plan on wear the water fuse BB cream while I fly as the cabin air is super drying on the skin!
The only thing I am not sure of is the one shade fits all.....Don't agree!

Alison Claire - Mango Body Butter
I adore body butter and this is awesome, smells amazing!! Great alternative to a perfume which can be kindof drying on the skin, this smells great and feels great!
Now I didn't get this large tub I got a sample but as I packed my camera already I could take a picture! Sorry!

 Nail inc.
 I have owned one other polish by Nail Inc. I have Piccadilly Circus - and now
- Porchester Square
I love these two shades, like my favourite colours!
Dermalogica - Daily Microfoliant
Another great travel product, Its a powder so no trouble with liquids in security! Yes!
Wet your hands and face and shake out some powder and create a paste. It goes a little milky and creamy and breaks down make-up while lightly exfoilating! Feels amazing!

Right I am off to finish packing, see you all very soon!
Sineady xx

Question
Would you be willing to look funny on the plane for the sake of great skin?
Let me know!
Sunday, 18 November 2012
IMATS Toronto 2012: The Haul
The weekend of IMATS is bittersweet. We excitedly make our lists, shop, shop, shop, and then it's all over. I think this year's IMATS has been the biggest turn out yet. I got pretty much got everything on my list except my lashes from Nigel's Beauty Emporium. Yes, this makes me very sad. I arrived in the afternoon and all the good lashes were gone! Hmm, maybe all us bloggers blogging about their crazy deal last year was a bad idea?! I spoke to a few vendors and a lot of them didn't expect to be almost sold out. Well, that's good news for IMATS - it's here to stay in Toronto!
Here's my recap of my day at IMATS and my haul!

Shopping with my partner in crime, Marlene, makeup artist and guest contributor on Makeup Junkie. We had some fun times - it's always more fun to shop with someone who loves makeup just as much as you do.

My first purchase of the day started with bdellium Tools. I lost all my face brushes earlier in the summer so replacing them with some awesome brushes from bdellium was my focus. All their lines are fantastic, but I am a huge fan of the Studio line. They are amazing quality and the yellow handles are so eye catching. I always love stopping by the booth because Edward and Daniel are always super nice and make a point to remember the bloggers.

I usually don't get a chance to see the seminars, but this year I made a point to see the uber talened and inspiring Lottie Stannard! I have been a fan of hers since her Model Mayhem days. Now she's an international artist keying the biggest fashion shows and working on some of the most famous celebrities. I really enjoyed her seminar on working in the fashion industry. She revealed a lot of important tips and personal experiences of how to make it in the industry. Some key points:

- On building your book: Don't start out doing crazy makeup. It won't work for commercial work. Choose a photographer's who's work you love and that has the same aesthetics you do. Don't say yes to every shoot. Do shoots that will only benefit your portfolio. Ask the photographer lots of questions like will there be retouching or no retouching, what the photog's retouching style is like, lighting, what the hairstyle will be, etc. A shoot has to be a whole collaboration. If hair and makeup or wardrobe don't go together, the whole image will flop.
- How to start doing fashion work: Runway work is the best way to break into fashion. It forces you to pay attention to detail and to be fast. There is no editing your work when you do fashion so you have to be at the top of your game. Contact agencies, the brands that sponsor the show, or the key makeup artist to see if you can start assisting at shows.
- Working in an agency: Getting into an agency is not the end all be all. There are a lot of misconceptions about being in an agency. It doesn't mean you'll be busy everyday, but it does open up many opportunities because they have access to the world's biggest clients. Choose the right agency for you, an agency full of artists who's work you admire. Be around people who are amazing at what they do because that's what you aspire to be.
- Other important tips: Lottie touched on assisting which I was happy she brought up because I had written a post about this last week here. When you are asked to assist it is a privilege. The artist is asking you to be on set because he/she trusts you. As an assistant, you are not there to network. Werd! Her top 5 foundations: Make Up For Ever HD Foundation, Face Atelier, M.A.C. Face & Body, and on celebrities Armani or Dior. On bridal work - invest in good foundations and lipsticks.

I'm pretty proud of myself because for the first time I actually stuck to my list and got less than I had planned. Here's the haul:

- Embroylisse Lait-Creme Concentre (24 Hour Miracle Cream): It moisturizes, primes, and acts as a makeup remover.
- bdellium Tools Studio Line Brushes:
- #953 Duet Fiber Foundation: I have a travel size one I use on my self so I decided to get 2 for my kit. I love the way it buffs foundation onto the skin. I really love using this for liquids because it doesn't leave any streaks like a flat foundation brush does. Also good for powder foundations. Apply in a circular motion for a flawless finish.
- #957 Precision Kabuki Airbrushed Effect: I have found a new love for applying blushes with a flat top brush. Creates a perfectly flushed cheek every time. I wish I had bought 2 of these, but will have to wait until next year!
- #948 Foundation Application: I got an extra traditional foundation brush to replace the other one I lost. These are still good for cream foundations or liquid.
- #980 Large Natural Powder Brush: Needed one of these to replace my MAC brush. Love how soft the hairs are on this brush!
- #546 Square Lip Brush: You can never have enough lip brushes especially when you're doing bridal. There isn't enough time to clean in between clients sometimes. I love the square brushes because they are wider and makes the application quicker while still being precise.
- #760 Precision Eye & Brow: Great for defining the brows and lining the eyes.
- #710 Eyeliner Applicator: I go back between an angled brush and a thin pointy brush for winging out the eyes, but I'm starting to prefer the thinner brush for getting a defined winged tip. Love the #710 because it's not too flimsy yet not too firm that it can't contour to the shape of the eye.
- Complimentary set: Edward and Daniel are always so good to the bloggers. In the travel set I received all the brushes I wanted to try! Includes the 731 mascara fan (love to comb through the lashes with this or apply mascara when I don't have wands), 542 bold lip brush (the tip is rounder and will give precise application), 768 round dome shadow brush (great for contouring smaller eyes or in the crease), 746 bold angled eye brush, 775 duet fiber shader for all over application, and another 546 square lip brush for myself!
- Mascara wands from Nigel's Beauty Emporium: So I didn't get the lashes but I picked up some wands. They were only $2.50 for a pack of 25 - much cheaper than any other booth. I only got 3 packs and wish I had bought more! I had bought the red wands last year and didn't really like how flexible they were. They were too flexible and didn't really grab the lashes as good.
- yaby cosmetics Blush Refill in bl015: I love the pigmentation of yaby's shadows and blushes. I needed a peachy-pink matte blush to complete my collection of blushes. This shade is so pretty and soft - great for bridal or everyday wear.
- OCC Lip Tars in Feathered and Narcissus: This booth was packed all day. I picked up Narcissus a lavender toned pink because it's different from a lot of the pinks I own. This could be great for fashion or toned down for bridal work. I also picked up Feathered a true white that could be awesome for fashion work or mixed with other shades to lighten. I can't wait to work with these lippies!
That rounds out my IMATS haul! I was only there for a few hours but I bumped into so many people I knew and finally met people I have talked to over Twitter and FB. I don't get out much to socialize so it was really awesome to catch up with some of my fave beauty bloggers and makeup artists. It was great to see Fiona, Jenn from Spiced Beauty, Donna Marie, Nicole Richards, Arianne from Glitter Geek, Tess from Makeup By Tess, Ande from Make Me Over Ande, from across the room makeup artist Delia, Dawna Boot, and Laura Amaya. Be sure to visit their pages to see what their hauls were!
Until next year! What did you pick up? What were your favourite moments at IMATS?


Saturday, 17 November 2012
Get the Look: Modern Day Bardot

Photographer: Artiese Studios, Makeup: Joy David-Tilberg, Hair: Emily Pike, Model: Betta (Spot 6)
Trends come, go, and come back again. I love recreating modern versions of iconic beauty looks. Brigette Bardot's sexy kitten eyes and big bombshell hair is making a comeback thanks to musicians like Adele and TV shows like Mad Men. This is a sexy look that will work for everyone.
Be a modern day Bardot with these easy hair and makeup tricks that will work day or night! I interviewed hair expert, Emily Pike, who helped me create this look on our model Betta.
Get the Look
Makeup:
- bdellium Tools #710: To recreate a sexy cat eye, a thin pointy liner brush is essential for a precise application. The look I created was a mix of mod 60's and a cat eye. I love bdellium brushes and the 710 is easy to control especially if you're lining in the crease.
- tarte cosmetics Amazonian Clay Waterproof Liner in Plum: To bring this look to modern day, I thought using a coloured liner would give it a fresher look. I love these creamy liners from tarte. They apply so smoothly and stay put all day - no creasing or fading. The shades are vibrant and pigmented. Dip your line brush into the product and start by lining your top lash line and wing it out towards your brow. Then start at the inner corner and make a line in your crease meeting with the tip of your winged liner. Leave the lid bare or apply a beige or white shadow to really accentuate the shape. Use the same liner and brush to line the bottom lash line and join it with your top liner. Use a black liner to line the waterline to give the eye more drama. To make this work for day, skip lining the crease and bottom liner.
Hair:
- Schwarzkopf OSiS Dust It: This style works best on hair that was previously curled a couple of days before. Brush your hair and use a dry shampoo or a mattifying powder like Dust It by Osis. This will help give you amazing volume and absorb the oils in your hair to refresh your look. Dust your product of choice at your roots and and massage at your scalp with your finger tips. Use the same motion that you would when washing/lathering your hair in the shower.
- Teasing Comb: Become ONE with a comb - it's time to tease, tease, tease like crazy! Once you've teased your hair from ear-line to hairline, smooth it all back and off your face with a light touch and a soft bristol brush. Take your time and check how it looks in the mirror as you tame the beast of frizz into the perfect shape and desired amount of volume. To make this look more modern and work appropriate just pull a small section of hair from above both sides of your ears and pin them at the back of your head. The result: a mod version of "half up-half down" with volume and a soft wave. Gorgeous!
About Emily Pike:
Emily is a WedLuxe award winning freelance hairstylist in Toronto who specializes in bridal, editorial, and commercial work. To book email: emilysarapike[at]gmail[dot]com or call 416.993.2281.
Thursday, 15 November 2012
Sweet Venom

Hey there! Here's an eye look I did purely for fun and because I wanted to use my new Sugarpill palettes which have been sadly neglected since I got them for my birthday. :*<
 |
| Click to view full sizes! |

Products:
-Lime Crime Candy Eyed Waterproof Eyeshadow Helper (Never sure if I'm typing this one correctly, lol)
-NYX Jumbo Eye Pencil in Milk
Sugarpill eyeshadows in:
-Acidberry (bright green on lid)
-2am (berry shade in crease)
-Poison Plum (deep purple to deepen crease and outer corner)
-Tako (matte white on browbone)
BFTE Cosmetics eyeshadows in:
-Ying Yang (metallic yellow-green on inner corner of lid, tearduct, and waterline)
-Autumn (metallic gold on very inner tearduct)
-Stunning (bright pink under lower lashline and on inner crease)
-Glistening (snow white with sparkles and slight pink sheen on browbone and inner corner)
-Lime Crime Makeup Uniliner in Orchidacious (purple liner on lid)
-MAC Fluidline in Blacktrack (upper lashline)
-Maybelline Mega Plush mascara in Blackest Black
-Hard Candy Glamouflage in Light
-mark. Powder Buff in Nude
Brow:
-NYX Jumbo Eye Pencil in Lime
-Sugarpill Acidberry
-BFTE Ying Yang and Autumn
There you have it! In my mind I was picturing some sort of exotic poisonous tropical plant you'd find in a rain forest; something flamboyantly colorful and ultra deadly. ;) My sister Abby named this look Venom; my sister Becky said I looked like The Hulk... can't win em all I guess, lol.
Anyway, it was fun to use my new palettes and of course I love my BFTE. I hadn't really used Stunning or Ying Yang much before and I love them, they're both awesome colors. My favorite part of this look is the yellow-green on the waterline and blended down into the pink under the eye. I think it gives an awesome metallic iridescence.

Thanks for reading! :)
*Some or all images were lightly edited using Aperture and/or Photoshop; for details, please read the photo editing disclosure widget at the bottom of my right-side bar.
*Some or all images were lightly edited using Aperture and/or Photoshop; for details, please read the photo editing disclosure widget at the bottom of my right-side bar.
Subscribe to:
Posts (Atom)