Monday, 19 December 2011

Darling Girl Cosmetics: Haul/Swatches, part 2!

 As promised, here's the (late) next part in my haul/swatch series from Darling Girl Cosmetics! (Click for parts 1 and 3!)
This installment will be the random eye products included in my order. There's a glitter, 2 eyeshadows, and a Spectral Shift which I've actually already used as an eyeshadow and LOVED. Keep scrolling...
First up we have Spectral Shift in "Mystique", a gorgeous light frosty aqua with PINK SHIFT! Spectral Shifts are actually highlighters which can also be used as eyeshadows or whathaveyou. I want a jar of this when my baggie runs out..


Swatched over Glitter Glue with my finger I think, so it's kinda thick lol. Can you see the pink sheen??

Same swatch but I tilted my hand so you can see the pink shift!
Next up is "Persuasion" which was the gift with purchase when I ordered on 11/11/11; GWP items are usually limited quantity but already several people are suggesting this color be made permanent.. it's made quite an impression!

Persuasion is a very complex color and I'm not sure I can describe it accurately but I'll try: to me it's a darkish lavender color with light green and aqua and gold(?) glitter in it. This glitter is the light iridescent kind so the overall appearance is almost rainbowy! I'm not even a glitter person but this color is stunning. More swatches coming up after the next item, which is....
"Jingle Bells" Pixie Sprinkles glitter and "Creampuff" eyeshadow. I think both of these were made for the Darling Deer holiday collection.

I only took one pic of the glitter, hopefully you can kind of see it here. Not the best lighting but oh well ;P That's Creampuff on the right but don't worry, there are better pics coming up!
Persuasion, Creampuff, and Mystique. This is with flash for sparkle! Creampuff is a purpley taupey plum shade or something (I stink at this lol) it has gold glitter in it but it's a lot finer than the glitter in Persuasion.

Daylight

You can see the rainbowy-ness of Persuasion in these pics<3


So there you go, I love these colors! Sadly, if you're looking to pick up any of these goodies you'll have to wait until after the holidays as the shop is closed while Susan concentrates on filling orders. Once it's open again I highly recommend Darling Girl's products, I've yet to be disappointed :)
Stay tuned for my last installment... blushes! ;D

Saturday, 17 December 2011

Holiday Lookbook: Shu Uemura 2011


The holiday season is such a fun time for makeup because the packaging is always interesting and beautiful. The colours are sparkling and bold. Holiday parties are a fun time to experiment with some colour! Think outside the typical smokey eye or red lip. Shu Uemura's holiday collection is a great example of how to use some bold yet wearable colours. 


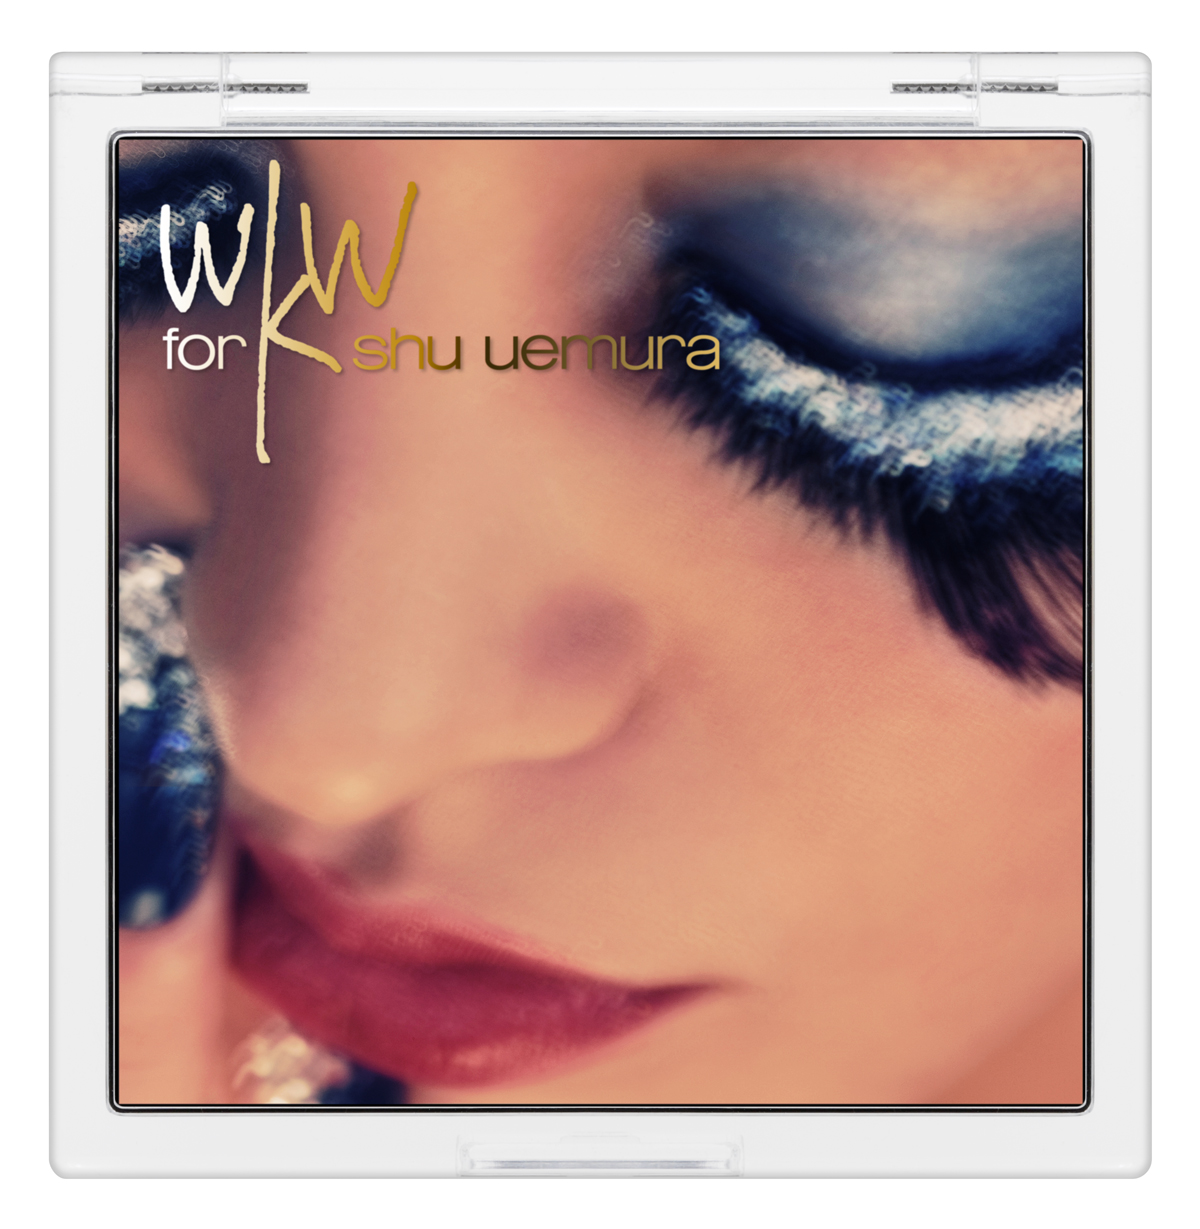
This season Shu Uemura teamed up with internationally renowned film director, War Kong Wai, to create some exciting eye palettes and lip shades. The palettes also feature a cool hologram! While the blue palette was gorgeous, I was immediately drawn to the purple palette. It features 4 shadows, 1 highlighter, and 1 cream blush that can also be used on the lips. The colour payoff is fantastic as usual and you have the option of creating many different looks. If you want something more subtle, use the gold across the lid and apply the cream blush a little heavier on the cheeks and lips. A purple smokey eye will definitely take the original version up a notch. This is definitely a palette to have fun with!

Swatches:


Have you tried Shu Uemura's holiday collection? Love it? Hate it? Want it?

Available at Holt Renfrew locations across Canada. 

www.shuuemura-usa.com

Products were sent for editorial consideration and I truly love them.

Friday, 16 December 2011

'Tis The Season For Giving Because Doing Good Is Beautiful!


It's not hard to get swept in all the hoopla that is the holidays. We're consumed with holiday parties, kid's Christmas concerts, primping to look your best and lots of shopping. I too get lost in all the madness especially with two little ones because you just want to make it as magical as possible. Thanks to the beautiful Rhia from artistrhi, she reminded me about the spirit of giving! Be sure to check her blog to donate to her special charities! I thought it was such a fantastic idea that she used CanadaHelps.Org to create her own donation page so I created one of my own!

Children's charities have become near and dear to my heart. In the effort to make my blog more personal, I've been going back and forth about whether I should post photos of my kiddies. My kids are my whole world and beauty blogging is also apart of my world so it seems natural to want to share the things that I love the most on the blog. This is the first time I've ever posted photos of my kids! Meet Little Man and Baby Z!


Many of you may remember me being hospitalized in the summertime. Well, shortly after I gave birth my son was admitted to Sick Kids Hospital in Toronto and needed surgery so that he could start eating. He was born 2 months early. As you can imagine, it was a gut-wrenching experience leaving my new baby at the hospital for almost 2 months. Thanks to the amazing staff and surgeons at Sick Kids, at 6 months Baby Z is doing well and thriving!

(Excuse the boxes in the background - we just moved!)

If you are in the spirit of giving, I would love for you to visit my donation page and give to 2 important charities: Sick Kids Foundation and Plan Canada. There are so many kids in need so lets make this holidays a special one for them. Thank you to everyone that has donated - this is the best gift I could ever receive! Happy Holidays everyone and remember doing good is beautiful! 


A donation button will also be on the right hand side of my blog. :)

xo,
Joy

Holiday Lookbook: Chanel Holiday 2011


I love being me, but I'd like to be her for at least a day. She's the "it" girl everyone wants to know at all the parties. 


If you want her look, you'll need to get your hands on Chanel's very luxe holiday collection. You can't get anymore glamorous than shimmering golds and ruby reds together.


Chanel Glossimer in Sparkle D'Or ($36 CAD): Chanel Glossimers are in my top 5 for glosses. One day I shall do a post of my favourite glosses to wear and to work with! This is definitely a splurge item, but because I use them for work I consider it an investment (I say to myself as I take out my wallet to pay). My stash is slowly growing. I love a lot of different glosses, but the Glossimers give such a dazzling shimmer to the lips it's unlike a lot of the other glosses I own. These are my go-to bridal glosses and just about every bride I've used them on has fallen in love. Sparkle D'Or (not pictured above) is the perfect shimmering gold gloss lovely on its own or added to the center of a red lip or just about any colour.


Chanel Rouge Allure Extrait De Gloss in Triomphal ($32 USD): With the amount of champagne you'll be drinking this holiday, you'll want something that's long-lasting. Not for the faint of heart, these long-wearing liquid lipsticks are richly pigmented with lots of gorgeous shine. The first night I wore this out, I made the mistake of wearing a lip balm and a gloss over top. I wore no lip liner, which was a bad move because it ended up bleeding and feathering. The next time I wore it, I blotted my lips after I applied my balm and used a lip liner first. It didn't budge for hours. Triomphal is stunning and looks more ruby red on me which I love. Looks beautiful with a baby pink cheek and shimmer on the cheekbones.


Chanel Rouge Allure Luminous Satin Lip Colour in Famous (LE, $32 USD): Appropriately titled, 'Famous' will get you noticed. The texture is really moisturizing and applied more like a gloss but with lots of pigment. I was pleasantly surprised because I thought it would look a lot heavier, but it's definitely wearable for day. It has a hint of shimmer which adds nice dimension to the lips. I'm totally in love with the packaging and is so Chanel. The black and gold combination is becoming a slight obsession of mine. The click-open case is wildly entertaining. I sat for minutes popping it open. I wouldn't say this is long-wearing, but it lasts for 4 hrs or so. I didn't find I needed a lip liner with this, but it didn't feather or bleed either even with lip balm. 


Chanel Eye Shadow Duo in Noir/Ivoire ($42 USD): An easy duo for a quick smokey eye. Noir/Ivoire is a classic palette of black-brown and ivory-gold. Creating a smokey eye with this was effortless. Use Ivoire as your base and highlight and apply Noir on the lid. Done! If you want a more classic look that puts the focus on your lips, use Ivoire all over the lid and dampen an angled brush and line your eyes with Noir. The textures go on very smoothly and are nicely pigmented. However, I found I had to layer the shadows over a long-wearing cream base to prevent it from fading. While it is a nice palette that could be considered a staple, this is definitely a splurge item. There are other brands that are much cheaper and have long-wearing shadows.


Chanel Highlighting Powder (LE, $72 USD): The holidays just isn't the same without a magical dusting of shimmer. This ivory mixed with pink and mother-of-pearl finish is a gorgeous highlighter. The design alone will appeal to us Chanel collectors, but even I think it's a little absurd to pay this much for a highlighter. Again, it is Chanel and as much as I love the brand I can't even justify it. But if you have the money or feel like splurging, well be my guest but I'd pass on this one from the collection.


Chanel Le Vernis in Rouge Carat ($25 USD): Red is such a classic shade, but you'll love this festive version. Rouge Carat is a sparkling ruby red with gold shimmer. I love Chanel polishes so I'm willing to splurge on their must-have shades.

Swatches: 

L-R: Chanel Glossimer Sparke D'Or, Rouge Allure Famous, and Rouge Allure Extrait de Gloss in Triomphal

Chanel Eye Shadow in Noir/Ivoire

Chanel Highlighter

Have you tried Chanel's holiday collection? Do you have any favourites or is this a pass?


Products were submitted for editorial consideration and I truly love them.

Thursday, 15 December 2011

Red Lip Flashback

I absolutely aDORE this lip and wanted to revisit it for the holidays. The only thing that I would do differently is take my MAC wax pencil (usually meant for brows) and line just above my lip line. That way it would trap any lipstick wanting to wander up into creases =). Merry Christmas!!!!

Wednesday, 14 December 2011

Colorful Winter Wonderland: My look

Here's my half of the Colorful Winter Wonderland posts! This was for the Makeuptalk/Sugarpill contest which ends tomorrow so I don't yet know who will win.. but the prize is Sugarpill so I really want to win!! lol anyway, please keep reading to see more ;)
As always, pics are clickable!
My sister was enjoying snapping random pictures of me lol
Products I used:
-Eye and Lip Primer from BFTE (on eyes)
-Smashbox Photo Finish Light primer
-Revlon Colorstay foundation in "Ivory" for Combination/Oily Skin
-BFTE shadow in "Butt Naked"
-Darling Girl Cosmetics blush in "Secret Star"
-BFTE shadow in "Yellow Brick Road"
-BFTE shadow in "Cornflower"
-Darling Girl Cosmetics "Mystique" Spectral Shift
-NYX Jumbo Eye Pencil in "Milk"
-Darling Girl Cosmetics Glitter Glue
-NYX "Snow" glitter
-Sephora mini white eyeliner pencil
-Coastal Scents 88 Palette (matte white shade)
-Red Cherry #507 lashes
-wet n' wild  Megaliner in Black

I wrote a walkthrough of my look to go with my entry:


"This is my rainbow snow lady look :) I was inspired by.. just pale colors and frosty-looking skin. Kind of like the White Witch from the Lion, the Witch, and the Wardrobe movies. It took me several hours to get it looking the way I wanted and I used a lot of products:
First I used an eye primer from BFTE Cosmetics on and around my eyes, and Smashbox Photo Finish Light primer on my face. Then I used a soft synthetic brush to buff foundation all over my face; I used Revlon Colorstay in Ivory for Combination/Oily skin. Next I used another soft synthetic kabuki-type brush to dust highlighter all over my face, concentrating on my nose and cheekbones; I used Butt Naked eyeshadow from BFTE Cosmetics. For rosy cheeks I used Secret Star blush from Darling Girl Cosmetics on the apples of my cheeks. Next I added the yellow and blue on my cheekbones and temples; for the yellow I used Yellow Brick Road eyeshadow from BFTE Cosmetics, and for the blue I used a combination of aqua shadows in my collection, trying to get the right color and opacity. (It mainly ended up being a combination of BFTE "Cornflower" and Darling Girl "Mystique".) I also used Mystique on my eyelids; it's a pale aqua color with pink sheen, so pretty! I also used a little more BFTE "Cornflower" on my outer corner/crease area; I applied both over NYX "Milk" pencil as a base. Next I used more Butt Naked shadow to highlight heavily all along my browbone to my inner corner/tear duct area, as well as on my eyebrows. Then I applied a Sephora brand white eyeliner pencil along my lower waterline and lashline, winging out at both inner and outer corner. Along there I dusted on a little matte white eyeshadow from my Coastal Scents 88 Palette. After applying false lashes, (Red Cherry #507 with Duo glue), I used a little black liquid liner along my inner lashline because the lashes stopped too abruptly, lol. (Falsies have a hard time fitting to my eye shape :( ) Next I took a piece of Scotch tape and used a snowflake shape-puncher to punch a snowflake-shaped hole in the tape; I stuck it on my temples and down along my cheekbones, dabbed on some Glitter Glue from Darling Girl, and patted on NYX "Snow" glitter, using a concentrated amount. I then peeled off the tape and was left with lovely little glittery snowflakes. Using my fluffy synthetic brush and a small soft paintbrush from a craft store, I blended out the colors with more Butt Naked shadow so they would be soft, and also used it to highlight my face a lot because I wanted a really pearly frosty finish to my skin, almost like Data from Star Trek, haha. Finally I used some foundation on my lips and patted more Butt Naked over them to make them sort of blend into my face a little."
You may have noticed that my lashes look like they're barely attached.. this is an old pair and they're pretty bent up by now. Also my eyes are different shapes; my right eye is more rounded on top which makes applying lashes hard. These did not want to stick on the ends, especially the inner corners! >.<
 To make these snowflakes, I used this shape-puncher and Scotch tape:
I couldn't use them more than once so I had to make a new one for each flake x_x The effect was glorious, though!

Over all, I love how this look came out. It may look like I just slapped colors on my face, but I feel that it looks elegant and ethereal and gives a frosty, wintery feel. I could have kept adding darker colors and done a lot of shading and contouring and used lots of dark eyeliner and stuff, but I wanted to keep the look very light. It turned out exactly the way I wanted<3 (Of course if I could do it over again I'd make sure to apply the falsies correctly no matter how many times I had to redo them, lol.)

The contest was supposed to end today but they just announced a weeklong extension so there's still time to enter, people!
Well, I hope you enjoyed seeing my look as much as I enjoyed creating it! Thanks for reading! ^_~
Not sure why these pics look so grey.. the files on my computer don't look like that, this only happened after I uploaded them here.. :(
 Fin.

Tuesday, 13 December 2011

Colorful Winter Wonderland: Becky's look

*My sister Becky and I entered a makeup contest on Makeuptalk.com; the theme was "Colorful Winter Wonderland"! This is a post about Becky's look; she wrote the following for me to include on my blog :)*
Starting out with NYX "Milk" pencil as a base, I then used the "Oyster" jumbo pencil to map out my purple area, tracing 2/3 of my crease and up and around down to my under-eye. I filled in that scissor shape with the pencil and then dabbed BFTE "Starstruck" over it heavily. Then I took BFTE "Envy" and lightly brushed it along my inner corner and up over my brow-bone. (I didn't want it too bright because it's supposed to be snowy.) Then, taking BFTE "Tickle Me" I traced the crease and around to my wing. Careful not to cover the bottom of my upper lid, I added more Envy right in the center to give it shine. Added more Tickle me to deepen the color, added BFTE "Grace" to blend the crease a little more, and a little to the inner corner. Finally added another dimension by putting Spellbound over Tickle Me in the crease and outer corner around the wing. This really made the Envy pop.
After this I added BFTE "Illusion" to my eyebrows and as an eyeliner on my top lash line and bottom water line.
I added BFTE "Whisper" all around the eye and a dash of "Way Up High" to add some more frost on my cheek as well. Then I used some clear mascara and a mixture of white glitter and holographic glitter on top of the Envy, on my lashes, and on my cheekbones.
Blending blending blending.
Finished it off with a mark. berry pink lip gloss. Tada!
Side note: using a white cream eyeshadow I highlighted my eye area with a subtle touch (not to make a mask) but to give it a frost. On my nose, cheekbones, between my eyes, and around my eyebrows. Careful not to be too prominent.
 My own post will be coming up soon ;) Thanks for reading!<3